Getting Started With Your Vaccum
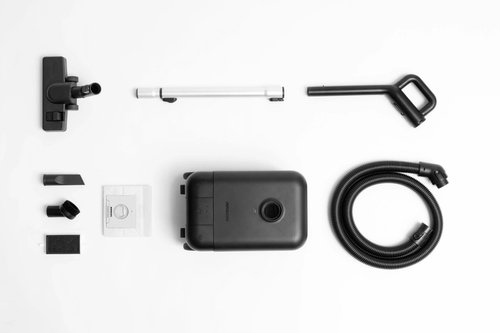

1. Everything That's Included
Take a look at everything that came in the box. You should see:
- 1 x Canister Vacuum (x1)
- 1 x Multi-Floorhead (x1)
- 1 x Telescoping Wand (x1)
- 1 x Brush Tool (x1)
- 1 x Crevice Tool (x1)
- 1 x Accessory Clip (x1)
- 1 x Vacuum Hose (x1)
- Multi-Floorhead (x1)
- 1 x HEPA-14 Filter w/ Charcoal (installed in filter door) (x1)
- AirBags (x3)

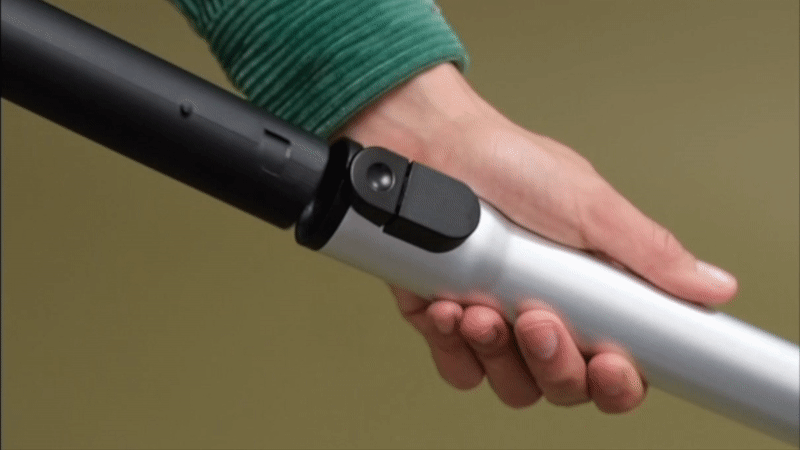
2. Connect the Handle to the Wand
Connect the wand to the handle and make sure you get the rather satisfying click. The first time might require a little pressure!
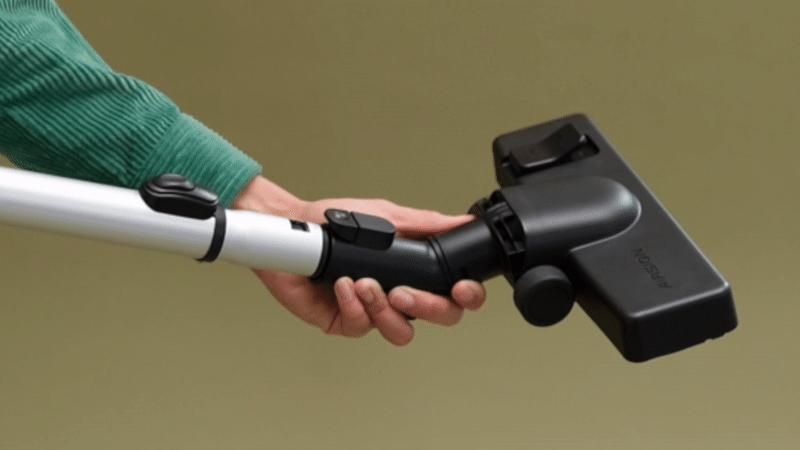

3. Connect the Wand to the Floorhead
Connect the wand to the floorhead, you'll also get a nice click here.
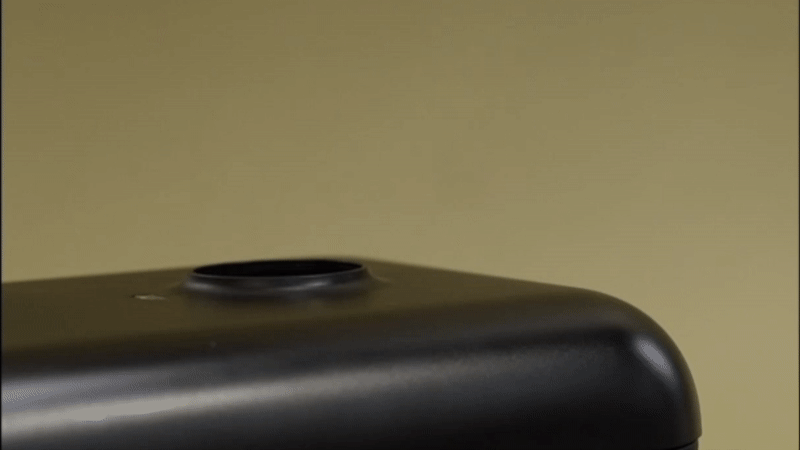

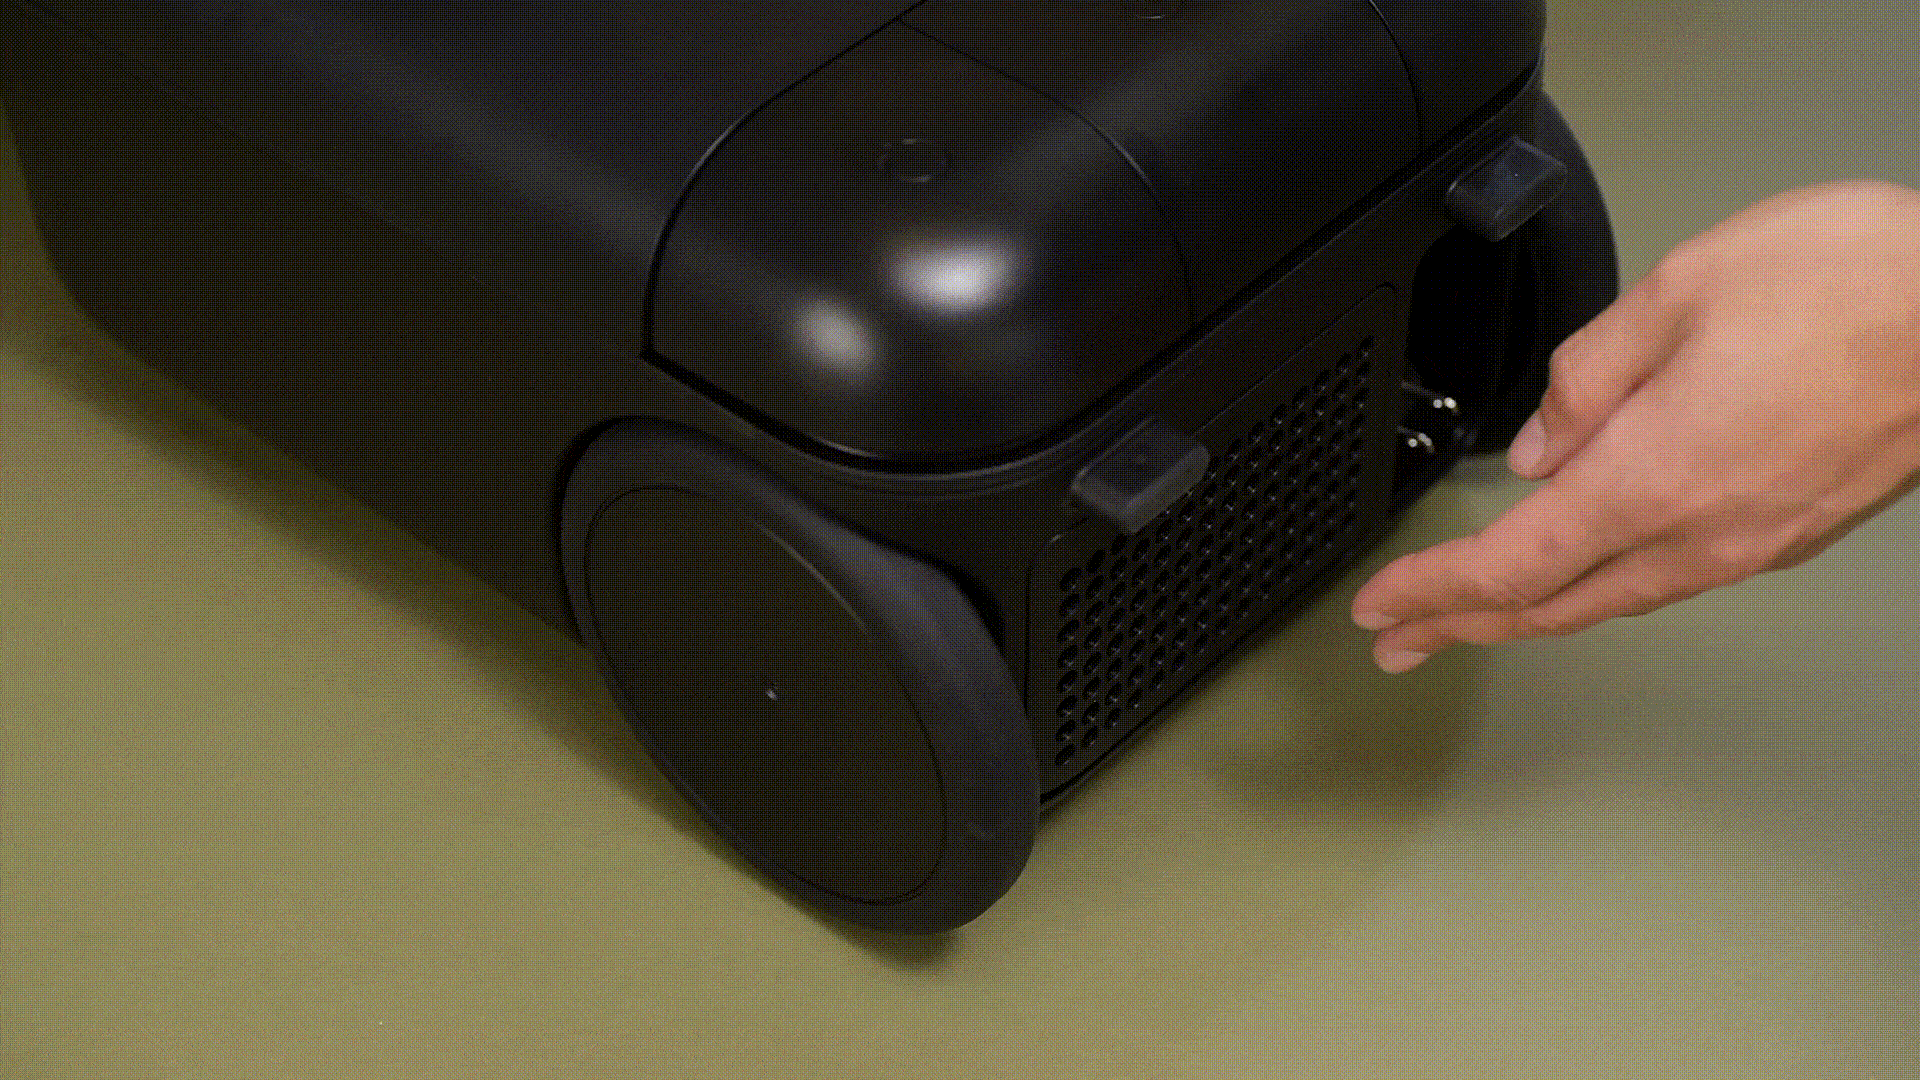
4. Connect the Hose to the Canister
Connect the larger end of the hose into the hose-port on the canister.
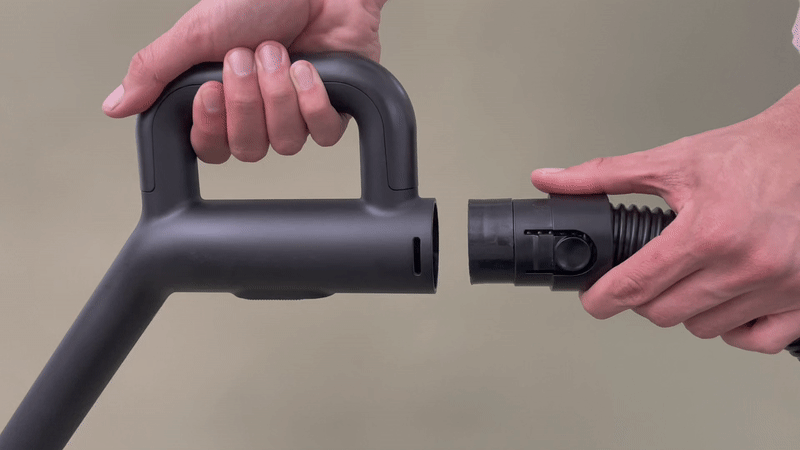

5. Connect the Hose to the Handle
Connect the hose's end to the handle, the buttons should align with the two visibile notches. You should feel it fit into place.


6. Replacing your AirBag
Open the canister door and slide the cardboard AirBag section into the bag lever. Insert it in the direction of the arrow on the bag. There are two rails that alight with the cardboard, sometimes you'll need to move the paper part of the bag out of the way.
Be sure to change your bag when it's 70% full or if you start to lose suction at any point!

7. Replacing Your HEPA Filter
Push on the filter door and it will open. Your filter is included and installed out of the box! You should change your HEPA filter every 6 months. To remove the old one, pull it out by the exposed ribbons and insert the new filter. The charcoal side should always be facing out towards you when the door is closed.